A Raw Disk Mapping (RDM) can be used to present a LUN directly to a virtual machine from a SAN. Rather than creating a virtual disk (VMDK) on a LUN, which is generally shared with other VMs and virtual disks.
The reasons for doing this should purley be for functional and management reasons, NOT performance. There is a mis-understanding that RDMs offer greater performance compared to VMDK's on a VMFS datastore. I've seen lots of vSphere environments that have gone over kill on RDMs for SQL servers and the like for "performance reasons", its difficult to manage! If your looking for improved storage performance look into the VMware Paravirtual SCSI (PVSCSI) adaptor.
The main reason for using an RDM should be as follows:
- To utilize native SAN tools and commands
- If using Microsoft Cluster Services (MSCS), Failover Clusters or other clustering solution
LUNs presented from FC, FCoE and iSCSI are supported for RDMs.
There are two RDM modes to be aware of:
- Virtual compatability mode provides vSphere snapshots of this virtual disk.
- Physical compatability mode allows the VM to pass SCSI commands direct to the storage system LUN. This allows it to leverage SAN specific features such as interation with the SANs own snapshot functions.
1. The first step to adding a RDM to a virtual machine is to assign an unused LUN to your ESXi Servers. This will vary depending on the type of SAN in use (consult the SAN vendors documentation on how to do this).
2. For the new LUN to become available, Rescan the HBAs on all your ESXi servers.
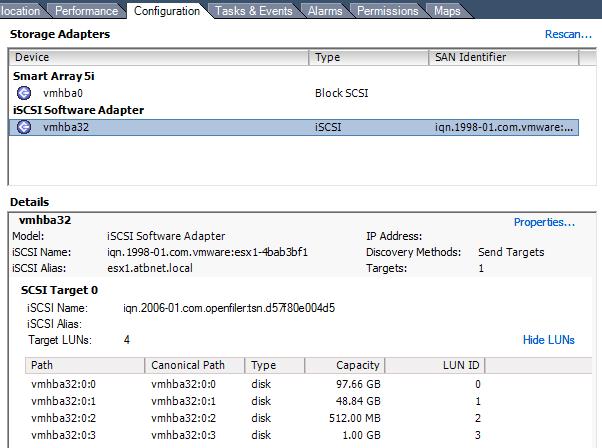
3. The virtual machine that the RDM is going to be added to needs to be shut down first, the RDM cannot be added while it is running.
4. On the hardware tab, click "Add" and choose "Hard Disk".
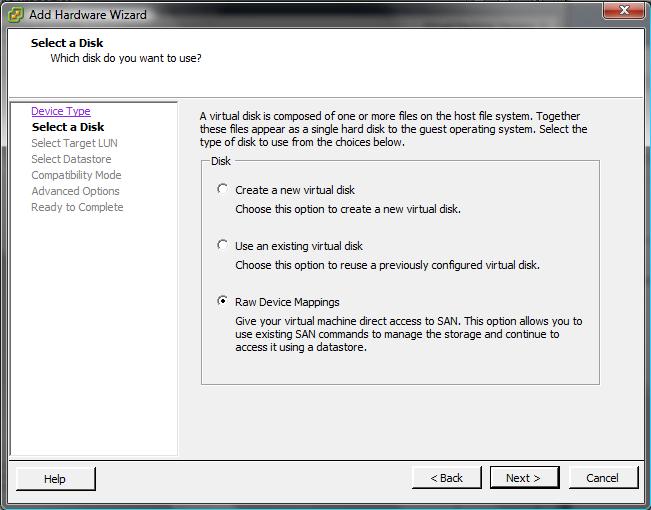
5. For the disk type choose "Raw Device Mapping" (RDM). Click Next.
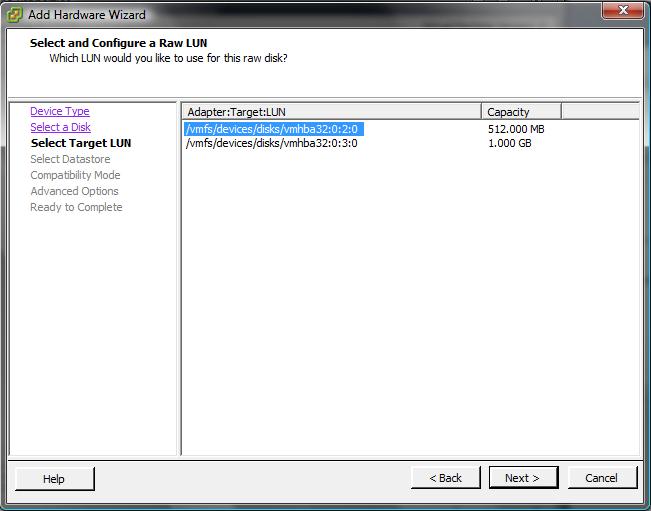
6. Choose the LUN. Click Next.
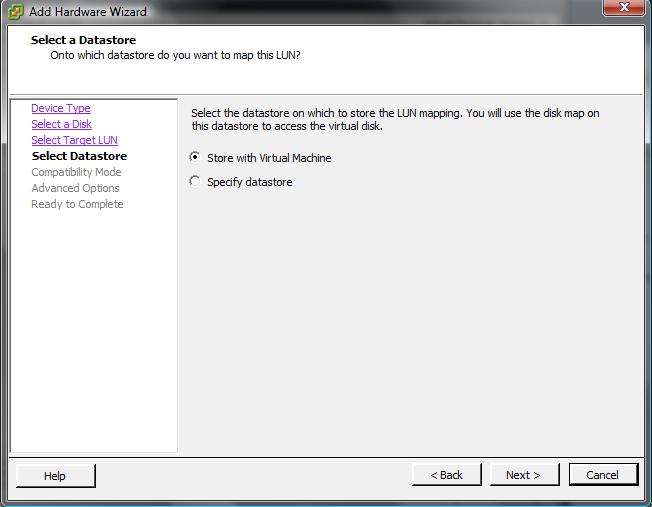
7. Choose "Store with virtual machine" or if you want store the link to the RDM in a specific datastore. Click Next.
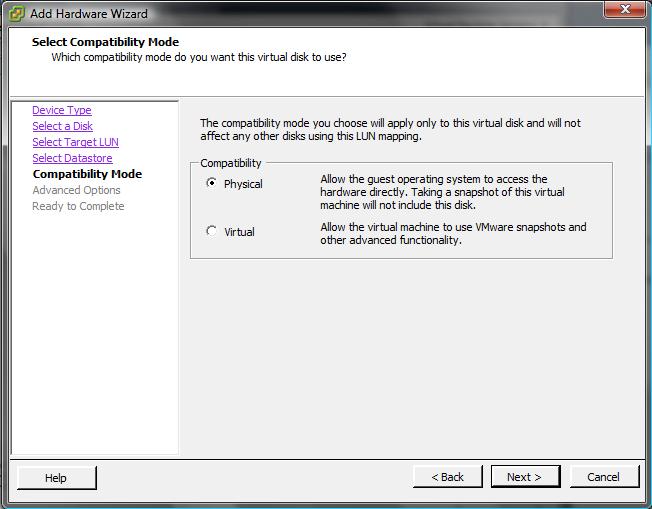
8. RDM volumes can be created in either "Physical" or "Virtual" compatability mode:
Virtual compatability mode provides vSphere snapshots of this virtual disk.
Physical compatability mode allows the VM to pass SCSI commands direct to the storage system LUN. This allows it to leverage SAN specific features such as interation with the SANs own snapshot functions.
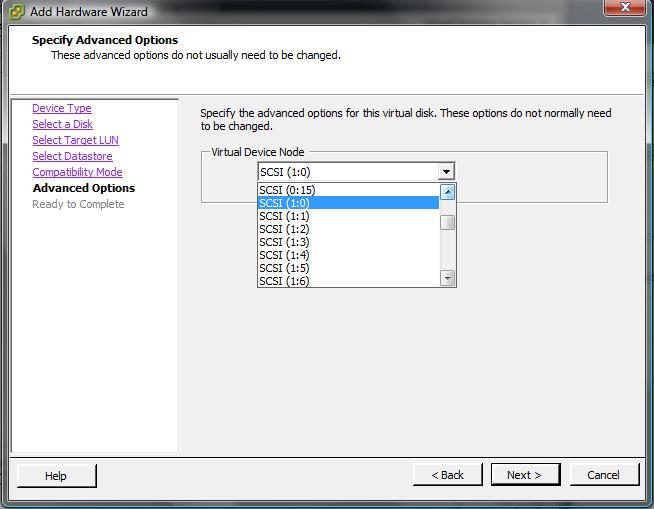
9. The RDM must be located on a seperate SCSI controller.
Choose a Virtual Device Node that is on a different SCSI bus to the current virtual disks (e.g. SCSI 1:0).
Click next.
10. Confirm settings and choose finish.
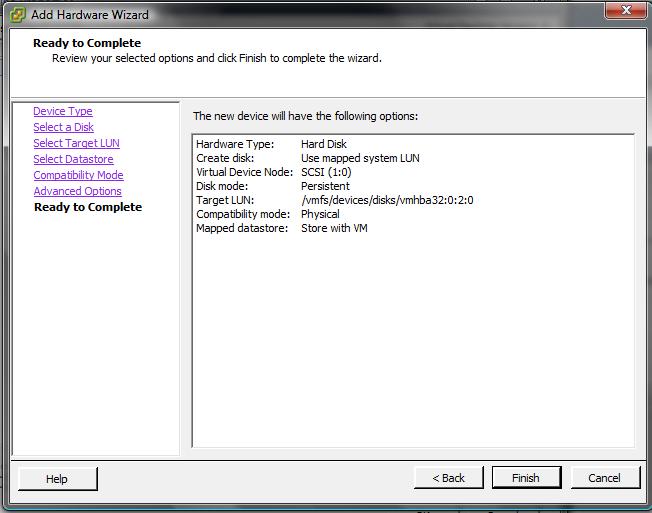
11. A new SCSI controller and hard disk is added to the virtual machine configuration. Now boot your VM. Depending on the OS check for new disks and format/mount the disk.

Share this blog post on social media:
TweetLatest Blog Posts
- vSphere 7 U1 - Part 3 - Creating a Datacenter, HA/DRS Cluster and Adding a Host
- vSphere 7 U1 - Part 2 - Deploying vCenter 7.0 U1 VCSA
- vSphere 7 U1 - Part 1 - Installing ESXi 7.0 U1
- Veeam CBT Data is Invalid - Reset CBT Without Powering Off VM
- View Administrator Blank Error Dialog/Window After Upgrade